Grouping Exporters by Tag


All NetFlow users can view tags, however only users with write privileges can add or remove them.

While navigating and working with your exporters, you might want to quickly access some specific exporters depending on their attribute.

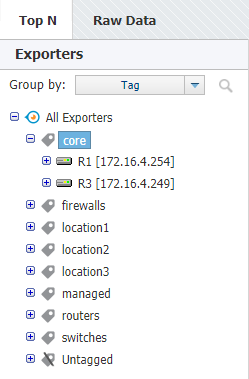
For this reason, NetFlow Analyzer menu has a possibility of grouping exporters based on any customly defined tag. For example, you can separate core and location devices, managed and non-managed, routers, switches and firewalls, etc.

Simply, choose Group by: Tag from drop-down picker available in Menu Panel.


NetVizura NetFlow Analyzer Exporter Grouping by Tag


On this page:

Single exporter can have more than one assigned tag, and in that case it will appear multiple times in the exporter tree.

To learn how to create a tag, see Working with Tags.


Searching for Exporter


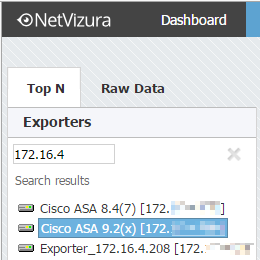
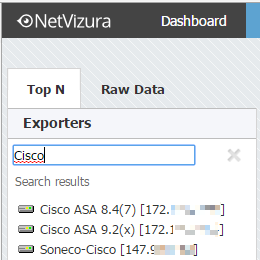
You can search for exporters by clicking the magnifying glass icon and then typing in part of the exporter's name.


You can navigate search results using up and down cursor keys on your keyboard. Selecting search result by clicking on it or by pressing Enter key will display its Overview on the right. Clicking the X icon takes you back to Exporters tree view with selected exporter in focus.


Another way to search for exporters is by theirs IP address. Just type in part of the exporter IP address to show matching exporters.


Discovering Exporter and its Interfaces

In order to complete exporter names discovery, it is required to have basic network administration knowledge and access to network devices.

Also, you need administrator privileges for setting up SNMP policies in NetVizura Control Panel.


First time when NetFlow Analyzer receives and processes netflow packets from a network device, it is automatically added to Exporters tree. Device initially appears as IP address (configured for NetFlow export), and its interfaces appear with dedicated SNMP indexes.

However, to further discover exporter and interfaces names and descriptions you will need to:

  1. Configure SNMP on your devices
  2. Make sure that NetVizura server and devices have network connectivity
  3. Add SNMP policies to NetVizura (Settings > Control Panel > SNMP Policies).


To learn how to configure SNMP policies in NetVizura, see SNMP Policy Settings.

After that, name discovering process is very easy:

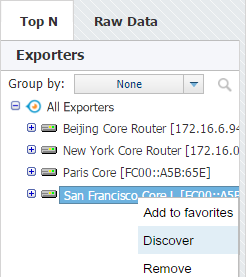
  1. Go to Top N > Exporters tree
  2. Right click on exporter or interface node
  3. Select Discover

Exporter or interface name will be set to sysName, while description (in tooltip) will be set to sysDescr value received via SNMP request. 


After discovery, additional information about the selected exporter or interface is available in the Details panel (Read more in chapter Traffic Details).

NetVizura NetFlow Analyzer - Exporters and Interfaces Discovery

You can test SNMP configuration on your devices from NetVizura shell by using command: 

[root@NetVizura ~]# snmpwalk -v <SNMP VERSION> -c <SNMP COMMUNITY> <IP ADDRESS>

Example:[root@NetVizura ~]# snmpwalk -v 2c -c public 192.168.2.101 


Removing Exporter

  • You need to have administrator privileges in order to remove exporters.
  • Removing an exporter that is operational may disrupt deduplication. Read more.

During the course of work, you might have old exporters that no longer send NetFlow data but they are still available in the tree. For this reason, you might want to clean them up. To do so:


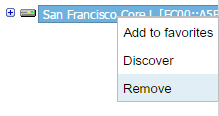
NetVizura NetFlow Analyzer - Exporter Removal


  1. Go to Top N > Exporters tree
  2. Right click on exporter node
  3. Select Remove
  4. Confirm your administrator password
  5. Click OK
If exporter continues sending NetFlow to NetVizura from a new interface, it will reappear in the tree so make sure to stop NetFlow export before you remove it.

Exporter and interface nodes in the navigation tree, as well as related data (alarms, reports, etc.) will be removed from view.

After removing exporter and its related items, NetVizura starts deleting its traffic data in the background. Depending on the size of the traffic and database storage settings, this may take some time.

If the same exporter continues sending NetFlow or if new exporter starts sending NetFlow with the same IP, it will be automatically added in exporters tree after data deletion is completed.


Rename Interfaces

You need to have administrator privileges to rename interfaces.

While working, you might want to give your interface a name other than the name obtained from SNMP. To do so:


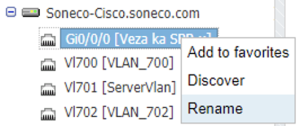
  1. Go to Top N > Exporters tree
  2. Right-click on the interface node
  3. Select Rename
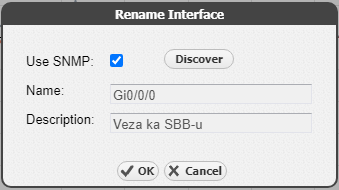
  4. Pop-up will appear

Click on the Discover button will populate name and description fields with information obtained with SNMP.
If the Use SNMP button is selected, changing the name and the description will be disabled.
When unselected, changing the name and the description will be enabled, and in the next discovery of the interface name and description will not be overwritten.
Click on the OK button will save changes in the database.
  • No labels